Hard water doesn’t just leave spots on glassware, it shortens the life of appliances, clogs pipes, and makes soap work harder than it should. A whole-house water softener tackles the problem at the source, treating every drop before it reaches fixtures, water heaters, and washing machines. Installing one isn’t as complicated as it looks, but it does require understanding how softeners work, sizing them correctly, and deciding whether the installation is a weekend DIY project or a job for a plumber. This guide breaks down what homeowners need to know before buying and installing a water softener system.
Table of Contents
ToggleKey Takeaways
- A water softener removes calcium and magnesium minerals through ion exchange, protecting appliances and extending their lifespan by preventing scale buildup.
- Signs you need a water softener include white scale on fixtures, soap scum, stiff laundry, and decreased water pressure—water hardness above 7 GPG warrants treatment.
- Salt-based softeners are most effective for hard water, while salt-free conditioners offer low-maintenance scale prevention but won’t eliminate soap scum or protect appliances as thoroughly.
- Proper sizing requires calculating daily water usage multiplied by water hardness in grains per gallon and desired regeneration frequency to avoid constant cycling or wasted resources.
- DIY installation is feasible for those with plumbing experience and accessible main lines, but professional installation ($200–$500) is recommended for galvanized pipes, well systems, or complex code requirements.
What Is a Water Softener and How Does It Work?
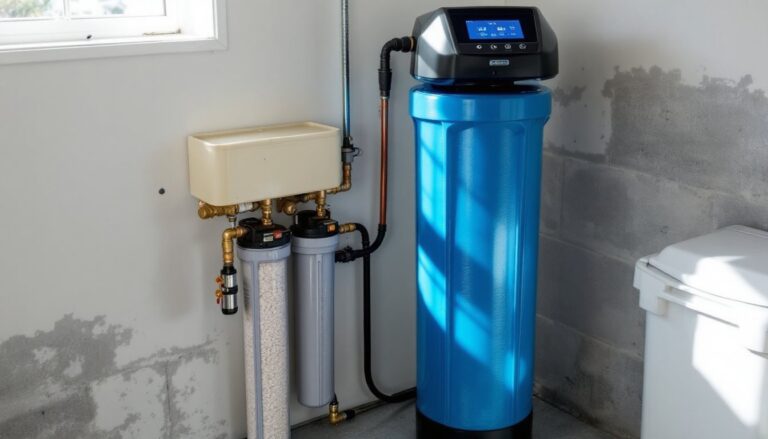
A water softener removes calcium and magnesium ions from water through a process called ion exchange. Hard water flows into a resin tank filled with small plastic beads coated in sodium ions. As water passes through, calcium and magnesium latch onto the beads while sodium ions release into the water. The result: softened water that doesn’t leave mineral deposits.
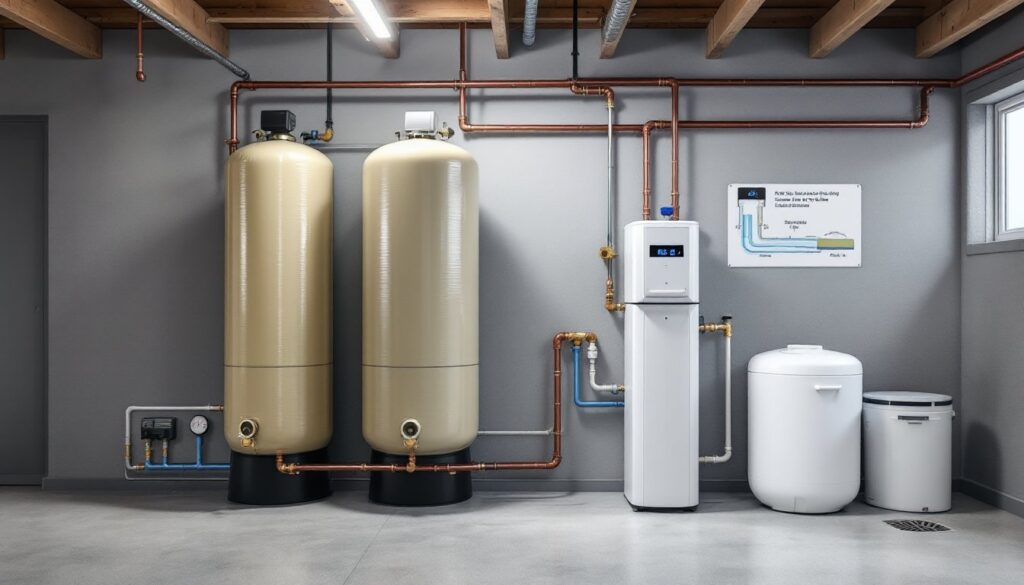
Most residential systems include two tanks, a resin tank (where the softening happens) and a brine tank (which holds salt for regeneration). When the resin beads become saturated with hardness minerals, the system automatically flushes them with a concentrated salt solution from the brine tank. This regeneration cycle strips away calcium and magnesium, recharging the beads with sodium so they’re ready to soften more water.
Typical regeneration happens every few days, depending on water usage and hardness level. The process uses water and salt, so homeowners need to refill the brine tank with sodium chloride pellets (water softener salt) every 4–8 weeks. Systems are usually set to regenerate during low-use hours, often 2 a.m., to avoid interrupting household water supply.
Signs Your House Needs a Water Softener
Spotting hard water problems early saves money on repairs and replacement appliances. Here are the telltale signs:
White scale buildup on faucets, showerheads, and inside tea kettles. This crusty deposit is calcium carbonate, the calling card of hard water. Cleaning hard water stains becomes a recurring chore without addressing the root cause.
Soap scum that won’t rinse clean from shower walls and tubs. Hard water interferes with soap’s ability to lather and rinse, leaving a film on surfaces and skin.
Stiff, faded laundry even with quality detergent. Mineral deposits cling to fabric fibers, making towels feel scratchy and colors look dull.
Decreased water pressure at fixtures, especially older homes with galvanized steel pipes. Mineral buildup narrows pipe interiors over time.
Frequent water heater repairs or early replacement. Scale accumulates on heating elements, forcing them to work harder and fail sooner. Sediment also takes up space in the tank, reducing capacity.
Dry skin and brittle hair after showering. Hard water leaves a mineral residue that’s tough to rinse off completely.
If two or more of these symptoms show up, testing water hardness is the next step. Hardware stores sell test strips for under $10, or homeowners can request a free test from local water treatment companies. Water hardness is measured in grains per gallon (GPG) or parts per million (ppm). Anything above 7 GPG (120 ppm) is considered hard: above 10.5 GPG (180 ppm) is very hard and warrants a softener.
Types of Water Softeners for Home Use
Not all softeners work the same way. Choosing the right type depends on water chemistry, household priorities, and whether someone’s willing to haul salt bags.
Salt-Based Water Softeners
These are the workhorse systems most plumbers install. Salt-based ion-exchange softeners physically remove hardness minerals, making them the most effective option for moderate to severe hard water.
Single-tank units combine the resin and control valve in one cabinet with a separate brine tank. They’re compact and fit in tight utility rooms or basements. Regeneration uses 40–60 gallons of water per cycle.
Twin-tank (dual-tank) systems keep one resin tank in service while the other regenerates. These work well for large households or homes with very hard water that need frequent regeneration, there’s no gap in soft water availability.
Metered systems regenerate based on actual water usage, not a timer. They’re more efficient because they only regenerate when needed, reducing salt and water waste.
Salt-based systems require regular maintenance: refilling the brine tank with salt, occasionally cleaning the resin tank with a resin cleaner, and checking the brine line for clogs. They also add a small amount of sodium to drinking water, not enough to taste, but people on sodium-restricted diets may want a bypass on the kitchen cold tap or a reverse osmosis filter for drinking water.
Salt-Free Water Conditioners
These systems don’t actually soften water, they condition it. Instead of removing calcium and magnesium, they alter the minerals’ structure so they’re less likely to form scale. This process, called template-assisted crystallization (TAC), converts dissolved minerals into microscopic crystals that stay suspended in water instead of clinging to surfaces.
Pros: No salt to buy or haul. No wastewater from regeneration. No electricity required. Lower maintenance.
Cons: Won’t eliminate soap scum or improve lather. Doesn’t reduce total dissolved solids. Not effective for very hard water (above 15 GPG). Won’t protect appliances as thoroughly as salt-based systems.
Salt-free conditioners suit homeowners who want some scale prevention without the hassle of salt, or those in regions where salt-based discharge is restricted. They’re also easier to install, many are inline cartridge systems that don’t need a drain line.
Choosing the Right Size Water Softener for Your Home
Undersized softeners regenerate constantly and wear out fast. Oversized units waste salt and water. Sizing a system correctly requires two numbers: daily water usage and water hardness.
Start with water usage. The average person uses 75–100 gallons per day. Multiply by the number of people in the household. A family of four typically uses 300–400 gallons daily. Check water bills for exact usage if available.
Next, test water hardness. Subtract any existing hardness in the municipal supply (if softening well water, test the raw well water). The result is the grains of hardness to remove.
Calculate the system’s required capacity using this formula:
Daily water usage × hardness (GPG) × days between regeneration = capacity needed (in grains)
Example: A four-person household uses 350 gallons per day. Water hardness is 12 GPG. They want the system to regenerate every 7 days:
350 × 12 × 7 = 29,400 grains
They’d need a softener rated for at least 30,000 grains. Common residential sizes range from 24,000 to 64,000 grains. Larger homes or those with very hard well water may need 80,000+ grain systems or dual-tank setups.
Don’t rely solely on the number of bathrooms or a manufacturer’s household size chart, they’re rough estimates. Real-world usage varies based on irrigation, laundry frequency, and whether teenagers take 20-minute showers. Going one size up provides a buffer and extends time between regeneration cycles, which saves salt and water.
Installing a Whole House Water Softener: DIY vs. Professional
Installing a water softener involves cutting into the main water line, adding bypass valves, running a drain line, and sometimes wiring a 120V outlet. It’s a manageable DIY project for homeowners comfortable with basic plumbing, but several factors tip the decision toward hiring a plumber.
DIY installation is feasible if:
- The main water line is copper or PEX with accessible shutoff valves.
- There’s a floor drain within 20 feet or a laundry sink for the drain line.
- The installation spot has a 120V grounded outlet nearby (some units require power for the control valve).
- Local codes don’t require a plumbing permit for water softener installation (many jurisdictions don’t, but some do, check first).
- The homeowner owns a pipe cutter, propane torch (for soldering copper), or PEX crimping tool, plus a tubing cutter and adjustable wrenches.
Typical DIY installation takes 3–5 hours. Most softeners come with a bypass valve kit and installation instructions. The process involves shutting off the main water supply, draining the line, cutting a section of pipe, installing compression fittings or soldering tees, mounting the softener, connecting inlet/outlet lines, running a 1/2-inch drain line (must have an air gap per plumbing code), and filling the brine tank with salt before starting the first regeneration cycle.
Professional installation makes sense when:
- The main line is galvanized steel or CPVC, which requires threading or special fittings.
- There’s no nearby floor drain, a plumber can run a longer drain line or pump discharge to an exterior location.
- The home has a well system with a pressure tank, softeners should install after the pressure tank but before the water heater, and pros know the correct placement.
- Local codes require a licensed plumber for backflow prevention or specific venting on the drain line.
- The homeowner simply doesn’t want to deal with soldering pipes or troubleshooting leaks.
Professional installation costs $200–$500 depending on complexity, not including the softener itself. Many experienced handymen can handle it if they’re familiar with local code. If you’re comfortable with common plumbing repairs but unsure about cutting the main line, consider hiring a plumber just for that step, then finishing the connections yourself.
One critical detail: softeners need a backflow preventer in some jurisdictions to prevent softened water from flowing backward into the municipal supply during pressure drops. Check with the local building department or water utility before starting. Also, always install a bypass valve, it allows the system to be isolated for maintenance or repairs without shutting off water to the entire house.
Safety note: Wear safety glasses when cutting pipes, metal burrs and water spray are common. Turn off power to the water heater before draining the main line to avoid burning out the heating element.
For homeowners tackling the project, many home maintenance resources provide step-by-step videos that walk through the process with real-world troubleshooting tips. Just remember: measure twice, cut once, and don’t skip the Teflon tape on threaded connections.