
Building a wine cellar transforms any home into a space where bottles age gracefully under ideal conditions. Whether planning a modest under-stair storage nook or a full basement conversion, the right approach balances climate control, layout, and budget. Homeowners who understand the fundamentals, proper insulation, cooling systems, and racking choices, can create a functional cellar that protects their investment and simplifies bottle management. This guide walks through location selection, essential design components, construction methods, and realistic cost expectations for adding a wine cellar to a house.
Table of Contents
ToggleKey Takeaways
- A wine cellar in house requires location selection on interior basement walls to minimize climate control costs, as basements stay naturally cool and avoid heat transfer from exterior environments.
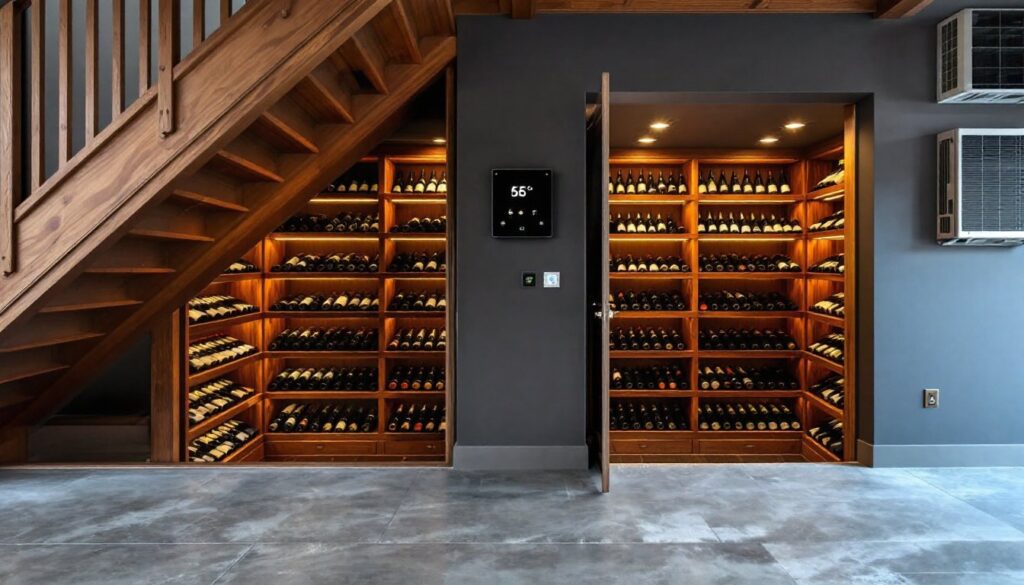
- Proper insulation with R-13 to R-19 batt insulation, vapor barriers, and sealed air gaps prevents condensation and mold while maintaining the wine cellar’s temperature between 55°F and 58°F.
- Dedicated wine cooling units from brands like CellarPro or WhisperKOOL are essential—standard HVAC systems cannot maintain the narrow temperature band and humidity levels (60–70%) that wine requires.
- A basic 50-square-foot wine cellar conversion costs $3,000 to $6,000 with DIY labor, while professional mid-range projects reach $10,000 to $15,000 depending on materials, cooling capacity, and custom millwork.
- Wall-mounted modular racking systems or DIY wooden racks support scalable storage (500+ bottles) and cost $5 to $15 per bottle stored, making inventory management and future expansion straightforward.
- Hiring licensed HVAC technicians and electricians for cooling unit installation and new circuit runs ensures code compliance, prevents costly callbacks, and protects your wine investment.
Why Add a Wine Cellar to Your Home?
A dedicated wine cellar solves three problems at once: it maintains consistent temperature and humidity, organizes bottles for easy retrieval, and adds tangible value to a property. Unlike kitchen counters or garage shelves, a properly designed cellar eliminates temperature swings that degrade wine over months or years. Collectors with more than a few dozen bottles quickly outgrow freestanding wine fridges, which lack the capacity and climate stability of a built environment.
Beyond preservation, a cellar becomes a functional asset during entertaining. Guests appreciate a well-curated selection displayed in a climate-controlled space, and homeowners avoid last-minute store runs. Real estate appraisers often note wine cellars as a premium feature, especially in markets where wine culture is strong.
The best cellars also accommodate future growth. Starting with 500-bottle capacity and room for expansion keeps the space relevant as collections mature. Homeowners who plan for scalability avoid the need for costly retrofits down the line.
Choosing the Perfect Location for Your Wine Cellar
Location determines how much work, and money, goes into climate control. Basements are ideal because they stay naturally cool and require less insulation than above-grade spaces. Interior basement corners, away from exterior walls, minimize heat transfer and simplify HVAC installation. Avoid areas near furnaces, water heaters, or laundry rooms where temperature fluctuates.
For homes without basements, under-stair closets or interior utility rooms work if they meet two criteria: they’re on an interior wall (not adjacent to a garage or exterior), and they have access to electrical and HVAC runs. Converting a ground-floor closet is feasible but demands thicker R-19 insulation in walls and ceilings to counteract heat from living spaces above.
Above-grade cellars need dedicated cooling units, not passive ventilation. A through-wall cooling system rated for the cubic footage is non-negotiable. Many homeowners integrating home renovation tutorials into their plans discover that retrofitting an existing closet costs less than building a new structure, provided the space already has adequate load-bearing support for racking weight.
Proximity to living areas matters for convenience but shouldn’t compromise climate control. A cellar tucked under a staircase near the kitchen beats a garage conversion every time, even if the garage is larger. Heat, vibration from vehicles, and poor insulation make garages the worst choice unless fully conditioned as interior space.
Essential Design Elements for a Functional Wine Cellar
A functional cellar starts with an insulated envelope. Walls need R-13 to R-19 batt insulation between studs, with a 6-mil vapor barrier on the warm side (the side facing the house interior). Seal all gaps around door frames, electrical boxes, and HVAC penetrations with spray foam. Skipping this step invites condensation and mold.
Doors deserve special attention. A solid-core or insulated exterior door with weatherstripping maintains the thermal boundary. Glass doors look elegant but require dual-pane, low-E glass and increase cooling costs. For cellars adjacent to living spaces, a threshold sweep prevents conditioned air from escaping under the door.
Lighting should be LED-based to minimize heat output. Incandescent bulbs raise interior temps and accelerate wine aging. Install fixtures with dimmer switches to reduce glare off bottles. Motion sensors are a smart add-on for cellars accessed infrequently.
Flooring needs to handle humidity without warping. Sealed concrete, ceramic tile, or luxury vinyl plank (LVP) all work. Avoid carpet and unsealed hardwood, both of which absorb moisture and harbor mildew. If choosing tile, use a slip-resistant finish, condensation on cool floors creates slip hazards.
Temperature and Humidity Control
Temperature stability is everything. Wine thrives between 55°F and 58°F, with no more than a 5-degree swing over 24 hours. Self-contained cooling units from manufacturers like CellarPro or WhisperKOOL fit through an exterior wall or into a ducted system. Size the unit to the cellar’s cubic footage, adding 25% capacity if the space has glass doors or multiple exterior walls.
Humidity should stay between 60% and 70% to keep corks from drying out. Most dedicated wine cellar cooling units include built-in humidifiers. In dry climates, a standalone humidifier may be necessary. Monitor levels with a digital hygrometer: cheap analog models drift off calibration within months.
Avoid standard HVAC systems. Central air-conditioning can’t maintain the narrow temperature band wine requires, and it dries air too much. A cellar needs a dedicated unit with a thermostat that holds setpoints within ±2°F. Backup power via a generator or battery system protects collections during outages.
Wine Cellar Construction: DIY vs. Professional Installation
Experienced DIYers can handle framing, insulation, and basic racking installation, but climate control equipment typically requires a licensed HVAC technician. Electrical work, adding circuits for cooling units and lighting, falls under National Electrical Code (NEC) Article 422 and may require permits depending on local jurisdiction. Running a new 120V or 240V circuit isn’t a beginner task: hire an electrician if unsure.
Framing a cellar follows standard 2×4 or 2×6 stud layouts at 16-inch centers. Use pressure-treated lumber for bottom plates if building on a concrete slab. Drywall or moisture-resistant greenboard works for walls, though some builders prefer tongue-and-groove cedar planking for aesthetics and humidity resistance. Cedar smells great and naturally resists mildew, but it costs more and requires periodic sealing.
Door installation is straightforward if the rough opening is square and plumb. Pre-hung exterior doors simplify the process. Shim carefully and check that the door seals evenly around the frame before securing hinges. A poorly hung door leaks conditioned air and overworks the cooling unit.
Professional installation makes sense for cellars larger than 100 square feet, cellars with glass walls, or projects requiring structural modifications. Load-bearing walls, beam reinforcement, or foundation underpinning all demand an engineer’s stamp and a general contractor’s oversight. When browsing contractor directories for quotes, verify that candidates have wine cellar experience, generic remodelers often underestimate insulation and cooling needs.
DIY builds save 30% to 50% on labor but take longer. Expect four to six weekends for a small (50-square-foot) closet conversion, not counting cooling unit installation. Rushing through insulation or vapor barrier steps leads to expensive callbacks down the road.
Storage Solutions and Racking Options
Racking determines how many bottles fit and how easily they’re accessed. Individual bottle racks hold each bottle horizontally in its own slot, maximizing visibility and airflow. Standard depth is 12 inches for Bordeaux bottles: Champagne and Pinot bottles need 14-inch slots. Single-bottle racks cost more per linear foot but simplify inventory management.
Bulk or bin storage stacks cases in large cubbies, ideal for collectors who buy by the case and age wines for years. Bins reduce cost per bottle stored but make retrieving a single bottle from the middle of a stack a hassle. Combining individual slots for ready-to-drink bottles with bin storage for long-term aging offers the best balance.
Materials range from pine and redwood (affordable, easy to cut) to mahogany or walnut (premium look, higher cost). Metal racks work but can corrode in high humidity unless powder-coated or stainless. Avoid particleboard or MDF, both swell and delaminate in cellar conditions.
Modular racking kits from companies like VintageView or Wine Enthusiast ship flat-pack and assemble with basic tools. Custom millwork delivers a tailored fit but costs two to three times as much. For homeowners comfortable with a miter saw and woodworking project plans, building racks from dimensional lumber is straightforward. Use 1×12 pine boards for shelves, cut dados for bottle dividers, and secure with finish-grade screws.
Leave at least 3 inches between the back of racking and the wall for airflow. Racking anchored directly to studs with 3-inch deck screws can support hundreds of pounds per linear foot. Wall-mounted systems beat freestanding racks in stability and floor space efficiency.
Budgeting and Cost Considerations
A basic 50-square-foot closet conversion runs $3,000 to $6,000, covering insulation, vapor barrier, a through-wall cooling unit, a solid door, and simple pine racking for 200 bottles. Mid-range projects with custom millwork, upgraded lighting, and larger cooling systems hit $10,000 to $15,000 for 100 to 150 square feet.
High-end cellars with glass walls, mahogany racking, stone flooring, and commercial-grade cooling equipment start at $20,000 and climb past $50,000 for spaces exceeding 200 square feet. Labor typically accounts for 40% to 50% of total cost in professional builds.
Breakdown by component:
- Insulation and vapor barrier: $1 to $2 per square foot of wall/ceiling area
- Cooling unit: $1,500 to $4,000 depending on capacity (up to 1,000 cubic feet costs less: 2,000+ cubic feet needs commercial units)
- Door: $300 to $1,200 (solid core to insulated exterior)
- Racking: $5 to $15 per bottle stored (DIY pine vs. custom hardwood)
- Electrical and permits: $500 to $1,500
- Flooring: $2 to $8 per square foot
Ongoing costs include electricity for the cooling unit, expect $30 to $60 per month for a 100-square-foot cellar in moderate climates. Hotter regions or poorly insulated spaces push bills higher. Factor in occasional humidifier refills and annual HVAC filter replacements.
Permits vary by jurisdiction. Electrical and mechanical work often requires inspection: structural changes always do. Budget $200 to $500 for permit fees and allow two to four weeks for approvals. Skipping permits risks fines and complicates future home sales.
Used cooling units from liquidation sales or equipment resellers cut costs but may lack warranties. If buying used, verify the unit’s age and service history. A five-year-old unit approaching end-of-life isn’t a bargain if it fails in year two. New units with three- to five-year warranties provide peace of mind and predictable performance.